I saw this awesome tutorial for clay pens over at Little Birdie Secrets.
I thought this would be a great project for the kiddos to make for the hubby, and the grand, and great-grand fathers for Father's Day. Seriously, men in our family always have a pen on them!!
It took a couple of tries to get our pens to turn out.
Helpful tips:
1. You need to cover the entire pen with the clay. If not, they plastic pen melts and bends, or melts and shrinks.
2. Don't bake the pens for more then a couple of minutes at a time. I followed the directions on the clay package. The oven got to hot, thus the reason for tip number one. I heated my oven to 300 and then turned if off and let it cool for a couple minutes and then placed the pens in for about 5 minutes. If they aren't done, then place back in the oven for a minute or two longer at a time. Seriously they shrink and the clay will crack if they are left in the heat for too long!!
3. Have an exacto knife, or a sharp knife on hand. The plastic melted at the tip and I wasn't able to get the ink back in to the pens. I had to use the exacto knife to scrape the opening out in order to get the ink to fit back inside the pen.
All in all this was a fun project, not so much for my kiddos, it was a little more involved than I thought. Probably better suited for a little older kids. My 4 and 2 year old contributed by helping me select the color combos.
Happy Sculpting!!
Thursday, June 30, 2011
Wednesday, June 29, 2011
Blobby Flip Flop Exchange!!!
I got my new flip flops in the mail last week!! I was sooooo excited!! I mean a new pair of shoes is an awesome thing, right?!?!
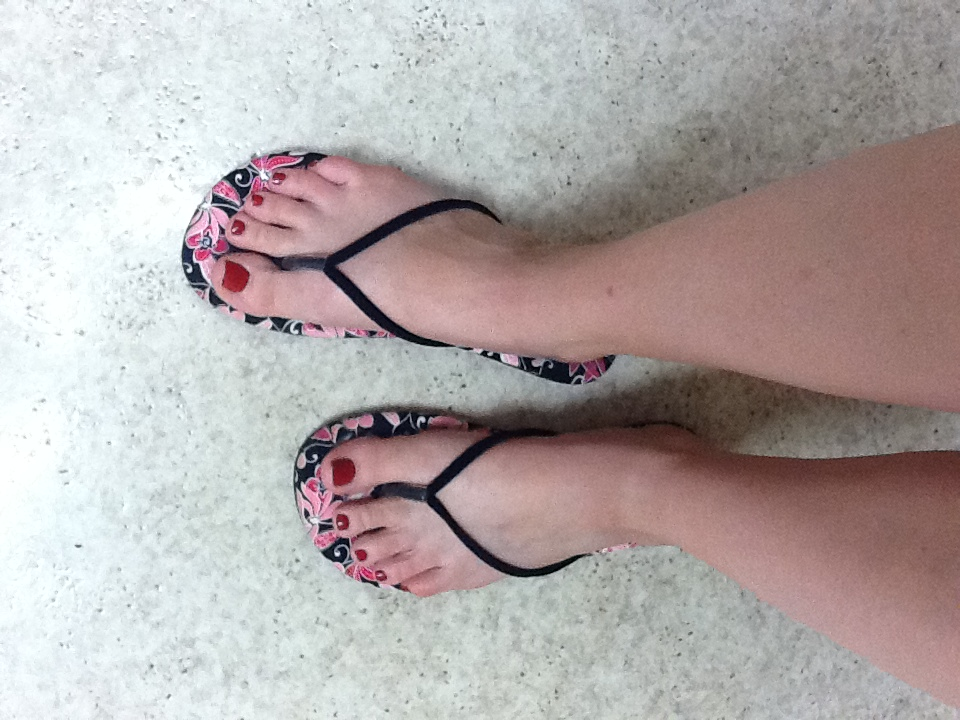
My exchange partner Jaclynn sent me these cute flip flops!!
They are so soft and squishy. I wore them all day yesterday and they were so comfortable. They have now molded to my feet!!
Jaclynn also sent me a packet of "California orange" poppy seeds.
I can't wait to plant them. I totally have a black thumb, but I just might be able to grow these. They don't require water after they are full grown, they like the full sun, and they prefer the poorer dirt!!
Sounds like a match made in gardening heaven!! This perfectly describes my front porch flower garden area. The past couple of years it has just been an extension of our yard since I can't seem to grow anything there.
And just so you know it s me and not the ground, the couple that used to live in our house had TONS of flowers everywhere!!!
I will keep you updated on my flower growing process. This just might boost my gardening self esteem.
I had so much fun with this exchange. Head on over to The Texas Darlings and check out all the other cool flip flops!!
Happy Flip Flopping!!
Labels:
Flip flop exchange
What's For Dinner Wednesday-Broccoli Stromboli Sandwiches
This is a recipe that I cut out of a magazine at least two years ago, but just hadn't tried until now.
Here is the stuff on your grocery list for this meal.
1 lb pizza dough (I used thin crust, but I wouldn't recommend, mine turned out to be a little too thin).
all-purpose flour, for work surface
1 lb frozen chopped broccoli, thawed
2 minced garlic cloves
coarse salt and ground pepper
1 cup marinara sauce
1 1/2 cups shredded mozzarella
2 ounces sliced salami ( I used pastrami)
1 tbsp olive oil
Start by preheating the oven to 400 degrees. Then line your baking sheet with aluminum foil for a simple clean up.
Divide your pizza dough into 4 sections. Roll or press each section in to a 6x8 in oval.
Place the broccoli in a strainer, and press to remove the excess water. Transfer to a double layer of paper towels to pat dry.
Divide the broccoli among the four sections of pizza dough. You want to leave a 1/2 in border all the way around the dough. Sprinkle with the garlic, salt, and pepper. Top with mozzarella, salami, and 1/2 cup marinara.
Now roll the Stromboli, starting with the shortest end. Seal the ends and place seam side down on the baking sheet.
Drizzle with the oil and then pop those bad boys in the oven for 25 to 30 minutes.
Serve each Stromboli with 1/2 cup of marinara for dipping.
Enjoy!!
Happy Baking!!
Labels:
recipes
Tuesday, June 28, 2011
My Little Artist
Mr. E has become quite the artist lately. The other day he created a whole scene to draw.
He LOVES to cut out pictures. So he took a bunch of the pictures he cut out of a seek and find book and lined them up against the wall.
Here is the scene.
Here is the artist.
Here is the finished work of art.
I will be setting up a gallery viewing in the new future. I will send all of you VIP passes!!
Any tips on fun artsy projects for a 4 year old? We were thinking about finding a summer art camp for him to participate in.
Happy Drawing!
Labels:
kid stuff
Monday, June 27, 2011
Makin' It Monday-Swimsuit Refashion Round 2
Okay I know that I showed you a simple modesty update to a swimsuit two weeks ago. This week I am gonna take the original ugly swim suit and show you how to make a cute set of bottoms!!
I don't know about you all, but I think it is hard to find a swimsuit that really fits my dairy air!!
I am not really ready for the granny pantie version of swimsuit bottoms that come up over my belly button, but I am tempted by the butty coverage they offer.
My solution to this problem is to make my own swimsuit bottoms!!!
So I took the old Grandma swimsuit from my friends modesty refashion. I ended up deconstruction the swim suit into the skirt, the bottom, and the top. I took the bottoms and matched the up with a pair of good fitting underwear.
I turned the cut ends over and pinned to the correct length. I tried them on to make sure they hit right above my hips. Once I was satisfied with the fit of the bottoms I sewed a casing for my elastic. I used 1/4 in elastic since that is what I had on hand. I measured my waist and added a couple of inches to determine the length of elastic I needed.
Now it is time to feed the elastic through the casing you made. Take a safety pin and run it through one end.
Rip open one of the side seams and start to feed the safety pin into the casing.
Keep pushing the safety pin through the casing until it is all the way around the waistband. Now take the two ends of the elastic and pin them together.
(sorry the pic is blurry)
Stretch the waistband out so that it is smooth over the elastic. Cut off the excess elastic and hand stitch the ends together. Make sure you secure it pretty well!! We don't want any wardrobe malfunctions in the pool!!
Once again stretch the waistband so that the elastic ends are in the casing. Now hand stitch the side seam closed!!
I added a second sewed line around the waistband right below the original one for the casing. The gives a more finished look and some extra stability!
Finally I cut off the excess fabric!!
Now to find a tip to go with my new bottoms. Don't get me started on how hard it is to find a swimsuit top to cover and support!!! I swear swimsuit makers don't think about what pregnancy does to your body!!!
Happy Swimming!!
Labels:
clothes refashion,
tutorial
Bloggy Flip Flop Exchange-Take 3
Last year I participated in the Bloggy Flip Flop Exchange over at The Texas Darlings. This is such a fun gift exchange!!!!
Last year I got a cool pair of flip flops!! Can't wait to see what my awesome BFFE, Jaclynn sent me.
I decided to send Jaclynn a pair of Knot flip flops, an Amy version of the Knot Flip Flops!
I found these cool purple flip flops at Target. I used some purple and green polka dot fabric for the straps.
Instead of doing double knots, I just did a single knot. I liked the more traditional flip flop look the single knot provided.
I also included some traditional Kentucky recipes for Jaclynn. Kentucky Hot Browns, Kentucky Derby Pie, and a Mint Juleps. What a better Kentucky dinner!!!
I hope Jaclynn likes her flops as much as I do!! I also added a little pair of flip flops for her little man. We women aren't the only ones who need snazzy shoes to wear!!
Happy Summer!!
Labels:
Gift Exchange,
Gift Ideas
Friday, June 24, 2011
Fabulous Find Friday-Water Slide
This past fall I spotted a COOL deal at my local Aldi's.
This puppy was over 50% off the original summer price. I snatched it up...well I grunted and groaned while struggling to lift it into my shopping cart. Then I grunted and groaned some more while lifting it and shoving it in the back of my car. I am sure everyone around me was amused at the sight!
Anyway we busted the water slide out the other day. The kids had so much fun going down the slide and then spraying each other with the water canon.
At nap time the hubby and I played on it!! And we had a lot of fun too. There is a big slide that you crawl up top to go down. Then there is a smaller slide that goes through the middle. It is fun to run and slide through on your stomach!!
This was definitely a great purchase!!
Happy Summer!!
Labels:
frugal shopping,
kid stuff
Thursday, June 23, 2011
Things to Try Thursday-Knot Flip Flops
I saw an awsome tutorial for flip flops the other day on The Mother Huddle. It came at the perfect time for me. I have a year old pair of Target Flip Flops. They were inexpensive, so I didn't have high hopes that they would last much longer than one season.
This was their current state, before finding the knot flip flop tutorial.
They weren't exactly working anymore.
I chose some fabric from my stash, and now a new pair of shoes!!
Happy Flip Flopping!!
This was their current state, before finding the knot flip flop tutorial.
They weren't exactly working anymore.
I chose some fabric from my stash, and now a new pair of shoes!!
Happy Flip Flopping!!
Labels:
clothes refashion
Wednesday, June 22, 2011
What's For Dinner Wednesday-Creamy Chicken Quiche
This is a recipe that I have made for my family once or twice before. When I was going through my recipes trying to decide what to cook for the week, this one caught my eye.
I love the creaminess (hence the name) of this quiche, and how all the flavors blend together just right to make it melt in your mouth!!
This recipe calls for you to make a crust. I know some people find this intimidating, but this crust couldn't be easier. I don't have a food processor, but that is really the easiest way to make a crust. Dump all the ingredients in, and turn it on. Once the ingredients form a ball you are done!!
Here is everything you need to make this yummy dish.
For the Crust:
1/2 cup butter
1 1/4 cup flour
1/4 cup Parmesan cheese, grated
1 tsp. paprika
2 tbsp. cold water
Filling:
1/2 cup butter or margarine
1/2 lb. mushrooms, sliced (I used a can)
2 cups chicken, cooked and diced
1 green onion bunch, chopped
3 eggs
1 tsp. salt
1 1/2 cups light cream
1 cup Swiss cheese, shredded
Blend crust ingredients together, roll out to make a 10 in. pie crust. Bake 5 minutes at 400 degrees. Cool.
Saute the mushrooms in the butter.
Add the chicken and green onions. Saute 5 minutes.
Drain off the excess butter, then add to the pie shell.
Blend egg, salt, and cream together. Pour into pie shell.
Sprinkle cheese over top.
Bake for 45 to 55 minutes at 350 degrees, or until set.
Serves 6.
Enjoy!!
Happy Baking!!
Labels:
recipes
Tuesday, June 21, 2011
T-ball Time
Last month Mr. E started t-ball. We had so much rain that the boys only had two practices before their first game. Needless to say they were a little confused on what to do.
Here is Mr. E before the first game. Can I just say whoever thought white pants for an outdoor sport was a good idea is CRAZY!!!!!
I am sure this is the beginning of many more summer sporting events. I hope he always has such a happy face!
Happy Game Going!
Here is Mr. E before the first game. Can I just say whoever thought white pants for an outdoor sport was a good idea is CRAZY!!!!!
A little pre-game practice and warm-up. The team colors are purple and white. I guess since they put boys in purple they would give them a snake for a mascot. I HATE SNAKES!!! Why couldn't we be some sort of dog or wolf? How about a Dinosaur? They are ferocious...well at least in the movies.
The cheering section. Miss C with one of the 3 cousins! She is also a t-ball player!!
Mr. E got to go shake hands with the other team as they determined who got to bat first.
This is my favorite picture. While the adults are talking shop Mr. E and the other little boy get down to business. I can just hear the conversation.
"So how old are you? "
"Four...me too, but I am almost five! "
Now is when the real entertainment started. Mr. E was the first to bat.
After hitting the ball he took off running....straight to the pitcher's mound. It was quite humerus. One of the parents was kind enough to set him back on the right course.
Here he is after his first run. Can you tell he is proud of himself?
I am sure this is the beginning of many more summer sporting events. I hope he always has such a happy face!
Happy Game Going!
Labels:
kid stuff
Subscribe to:
Posts (Atom)