Wednesday, June 30, 2010

What's Cookin' Wednesday-Sugar Cookies

I have made these ymmy cookies several times...and they are WONDERFUL!!!

I found this recipe while reading a wonderful book series by Joann Fluke...The Hannah Swensen Series
This series is full of delicious recipes and wonderful mysteries.  Two of my favorite things!

Here is the recipe:

Ingredients:
2 cups melted butter
2 cups powder sugar
1 cup white sugar
2 eggs
2 tsp. vanilla
1 tsp. lemon zest (optional...i didn't use it)
1 tsp. baking soda
1 tsp. cream of tartar
1 tsp. salt
4 1/4 cups flour
1/2 cup white sugar (in bowl)

Melt the butter.  Add sugar and mix well.  Let cool to room temperature and mix in the eggs, one at a time.  Then add the vanilla, lemon zest, baking soda, cream of tartar, and salt.  Mix well.  Add flour in increments, mixing after each addition.  Chill dough one hour or over night.  Preheat the oven to 325.  Use your hands or a mellon baller and form the dough into balls.  Roll the balls in the loose white sugar and place on greased cookie sheet.  Lightly press down to flatten.  Bake for 10-15 miniutes.  Cool on the sheet for 2 minutes and then remove to a wire rack.

This will yield 8-10 dozen cookies.
I made a butter cream icing to top the cookies with...and add an extra bit of sweetness.
Happy Baking!

Monday, June 28, 2010

Makin' It Monday-Recipe Cards

I have so many recipes that I love to make or want to make, but I run into the problem that I don't have enough recipe cards.  I will end up writing recipes on scraps of paper and store them until I can find some at the store.  I love cute recipe cards, but I hate how much you have to pay for them.  So, I thought I would make some...

Here is what you need:
Scrapbook paper
Cutter
Pens
glue stick
And something to draw straight lines
Start with cutting your paper.  I cut mine to be 4x6, but you might need them to be bigger or smaller depending on your cookbook.

Next, I used some scrap white paper to embellish my cards.

I also used some white cards and spruced them up a bit with some excess of the printed paper.


Just glue everything together.
Now, just add the lines and you are done!

Quick easy and easy on the wallet.  I made 20 recipe cards.  I think this would make a great wedding gift with a few of your favorite recipes and a new casserole dish. 

Happy Crafting!


Friday, June 25, 2010

Baby got a NEW pair of shoes!!

I was so excited when I checked the mail box today!!  I got some cool new shoes and some other goodies from Teresa at It's A Good Day

We participated at the 2nd Blog Flip Flop Exchange over at The Texas Darlings.  I sent her some flip flops and other stuff and this is what I got...

Aren't these just a cool pair hot pink flip flops!!

Then, there is this magazine from North Carolina.

Check out the pictures from the magazine.  Who wouldn't want to visit here.

Now for the final goodie...Barbacue sauce.  Just in time for supper.  I can't wait to try this yummy stuff out.  I think the grill is calling!

She aslo included a sweet note on this cool stationary from her Etsy shop.

Hope you have a great weekend!


Thursday, June 24, 2010

Things to Try Thursday-Monster Toy

I saw this tutorial a while ago over at sWeeT cHarLi and immediately bookmarked it.  I knew my little girl needed a sweet little monster to have in tow for those quiet play times.

Now you see me...

Now you don't...

Who wouldn't want to play peek-a-boo with this little Miss Monster.  The best part is that you can open up the case and store toys inside!!!  What a perfect gift for that little Monster in your life!!  Go check out sWeeT cHarLi's  tutorial.

We have church tonight and we will be testing out how quiet we can be while playing...

Happy Crafting.

What's for Dinner Wednesday-Cherry Pineapple Dump Cake

Sorry, this post is a day late, but hopefully it won't disappoint you.  This is literally one of the easiest, and tastiest desserts EVER!!!!  I try and keep the ingredients on hand at all times.  Yesterday we were invited to a cookout and I needed to make something to take.  I really need to go to the store (we have water and sweet tea to drink and that is it!), but didn't have time yesterday.  Never fear I just got out the following ingredients and went to work.
What you need:
1 can  cherry pie filling
1 can crushed pineapple
1 box white cake mix
1 stick of butter, melted

Open the two cans and pour them into a 9x13 baking dish.  Mix the cherries and pinapple together.

Cover the mixture with the cake powder cake mix.

Melt your butter and pour it over the top of the cake mix. Try to cover as much of the mix as you can.

Bake at 350 for an hour. 

This cake is great with topped with cool whip or whipped cream.  Just be careful filling is HOT!! 
This is also good for camping...if you have a dutch oven then you can do the same thing and have a yummy dessert next to the camp fire.

Happy Baking!

Monday, June 21, 2010

Makin' It Monday-Black Eyed Susan flip flops and shirt

I participated in a Flip Flop Exchange over at The Texas Darling.  I had so much fun coming up with my flip flop ensemble.  I made matching flip flops, hair clip, and shirt for my BFFE

Here is what you will need:
flip flops
scrap material (or old shirt)
silk flowers
hot glue gun
hair clip
t-shirt
wonder under
matching fabric
crochet thread
flower template from Card Inspired

I started with the flip flops.

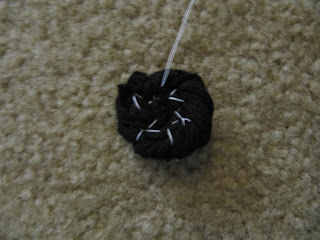
I took some scraps of black fabric and twisted the fabric and then wound it around and around and stitched it together on the bottom side.  These will be the centers of my flowers


Next, I took the petals of the flowers I bought and then hot glued them together.


I hot glued the fabric pieces to the flowers.
These are the centers for my flip flops and the hair clip.
I took a small circular piece of felt and a hair clip to make the hair clip.
I put hot glue on the back of the flower, placed the top of the hair clip in the glue, and then placed the felt on top. 
Here is the finished hair clip. 
Now on to the shirt.  I took a piece of fabric and ironed on a piece of wonder under.  Then I printed off the flower template from Card Inspired.  Cut out the flower pattern...don't forget to cut out the center.
Iron the flower to your shirt.
Then I took my crochet thread and an embroidery needle and decorated my flower.  I like to hand stitch my appliques to help secure them and add a little extra flare.
Here is the finished package that I sent to my BFFE.  I hope she likes it and has fun wearing it this summer!! 
Happy Crafting!!


Decor Mamma


Join us Saturdays at tatertotsandjello.com for the weekend wrap up party! UndertheTableandDreaming