Happy Day!
Monday, May 24, 2010
Shabby Apple Giveaway
That's right YOU could win a Shabby Apple dress!!! How cool is that???? Tatertots and Jello is hosting this awsome giveaway. If you win you get to pick the dress of your choice. That is a value of $130. Head over to Tatertogs and Jello and enter to win! Good Luck!
Happy Day!
Happy Day!
Makin' It Monday-Monogrammed Coffe Cup Cozy
I have seen these before and I thought I would try my hand at making a coffee cup cozy for my BIL.
Whatcha' need:
Fabric (scrap fabric will work just fine)
Felt/Fleece/Batting ( I used a fire proof batting from a previous project)
Crochet Thread (for monogramming)
Needle for monogramming
Scissors or rotary cutter
card board cozy template (i used an old one from Starbucks)
Button and an elastic
I started by taking my template and placing in on my fabric and cutting out my shape. I would suggest you make the cozy a little bigger than your template to allow for seam allowances. I didn't do this and my cozy is a little smaller than I would like, but it works just the same.
I did the same thing with my batting material.
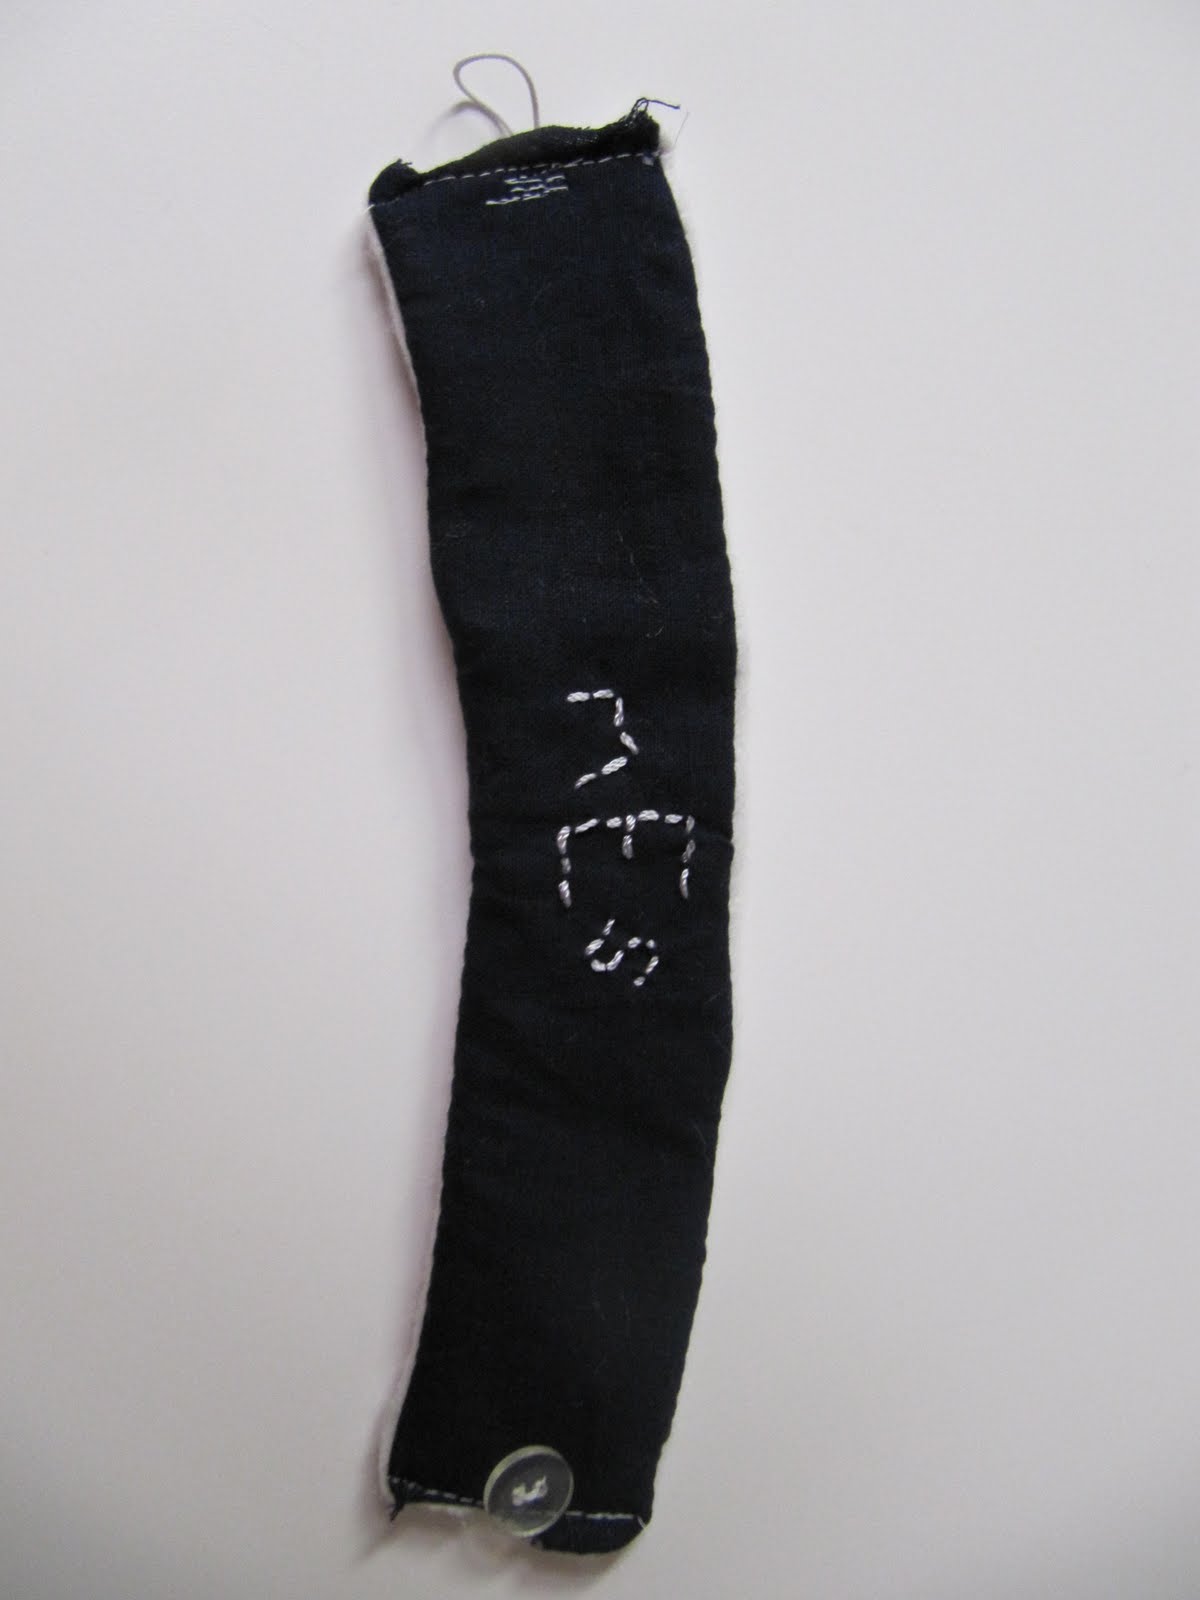
I monogrammed my fabric with the crochet thread and an embroidery needle. I used a fine point marker and traced my monogram on my fabric so I had some guidelines to follow.
I pinned my fabric and batting together with my monogram facing inward.
Next, I stitched around the outside of the cozy leaving one of the ends open so I could flip my cozy inside out.
Pin your elastic in the open end of your cozy. Fold the raw edges of the fabric in and sew the seam shut. I went over the elastic end a couple of times to help secure them in place.
Then sew your button on the front of the cozy on the other end.
You are ready to attach your cozy to your coffee cup.
With the monogram you will never get your coffee cup confused with anyone else again...unless they have the same initials as you.
Happy Sewing!!
"
Whatcha' need:
Fabric (scrap fabric will work just fine)
Felt/Fleece/Batting ( I used a fire proof batting from a previous project)
Crochet Thread (for monogramming)
Needle for monogramming
Scissors or rotary cutter
card board cozy template (i used an old one from Starbucks)
Button and an elastic
I started by taking my template and placing in on my fabric and cutting out my shape. I would suggest you make the cozy a little bigger than your template to allow for seam allowances. I didn't do this and my cozy is a little smaller than I would like, but it works just the same.
I monogrammed my fabric with the crochet thread and an embroidery needle. I used a fine point marker and traced my monogram on my fabric so I had some guidelines to follow.
I pinned my fabric and batting together with my monogram facing inward.
Next, I stitched around the outside of the cozy leaving one of the ends open so I could flip my cozy inside out.
Pin your elastic in the open end of your cozy. Fold the raw edges of the fabric in and sew the seam shut. I went over the elastic end a couple of times to help secure them in place.
Then sew your button on the front of the cozy on the other end.
You are ready to attach your cozy to your coffee cup.
With the monogram you will never get your coffee cup confused with anyone else again...unless they have the same initials as you.
Happy Sewing!!
Labels:
tutorial
Thursday, May 20, 2010
Things to Try Thursday- Placemat Pillows
I originally saw a tutorial on making pillows out of placemats from Better Homes and Gardens website. But I have also seen versions of this out in blogland too.
I took 6 linen placemats I found at a local thrift store, 6 buttons covered in some coordinating fabric, and thread.
This is what I ended up with.
Happy Sewing!!
I took 6 linen placemats I found at a local thrift store, 6 buttons covered in some coordinating fabric, and thread.
This is what I ended up with.
This is what I gave my Mom for Mother's Day. The buttons actually match ottomans in my Mom's Bedroom.
Happy Sewing!!
Wednesday, May 19, 2010
What's for Dinner Wednesday-Homemade Peach Pie
Well, how about dessert.
I promise baking isn't that bad. I know a lot of people are intimidated by baking and stay far, far away. The first thing to baking is making sure you have plenty of time to bake. If you feel rushed, then you are likely to mess something up, at least I am.
Here are the ingredients
For double pie crust:
2 1/4 cups all purpose flour
3/4 tsp salt
2/3 cup shortening
8-10 tbsp. water
For filling:
2 cans sliced peaches, drain 1 can
3/4 cup sugar
2 tbsp. all purpose flour
1/2 tsp. ground cinnamon
1/8 tsp. ground nutmeg
milk (optional)
Start by making your crust. Dump the flour, shortening, and salt into a bowl. You can use your hands, a pastry mixer, or (the quickest way) a mixer.
Mix the ingredients with a little water. Remember you can always add more water, but you can't take it out. When the dough is mixed it should be a little stiff, but stick together.
I like to take my dough and wipe the excess flour off the side and roll it into two balls with my hands.
Sprinkle some flour onto the surface you will roll your dough on. Then place one of the dough balls on the floured area and pat the dough into a circle with your hands. The flatter you get the dough, the less you have to do with a rolling pin. Sprinkle the dough with flour.
Roll out your dough to the size of your pie plate.
Carefully lift you dough and place into the pie plate. Press the dough down with your fingers so it fits well.
Combine the peaches, sugar, spices, and flour into a bowl.
Stir the mixture together with a spoon.
Pour the mixture into the pie shell.
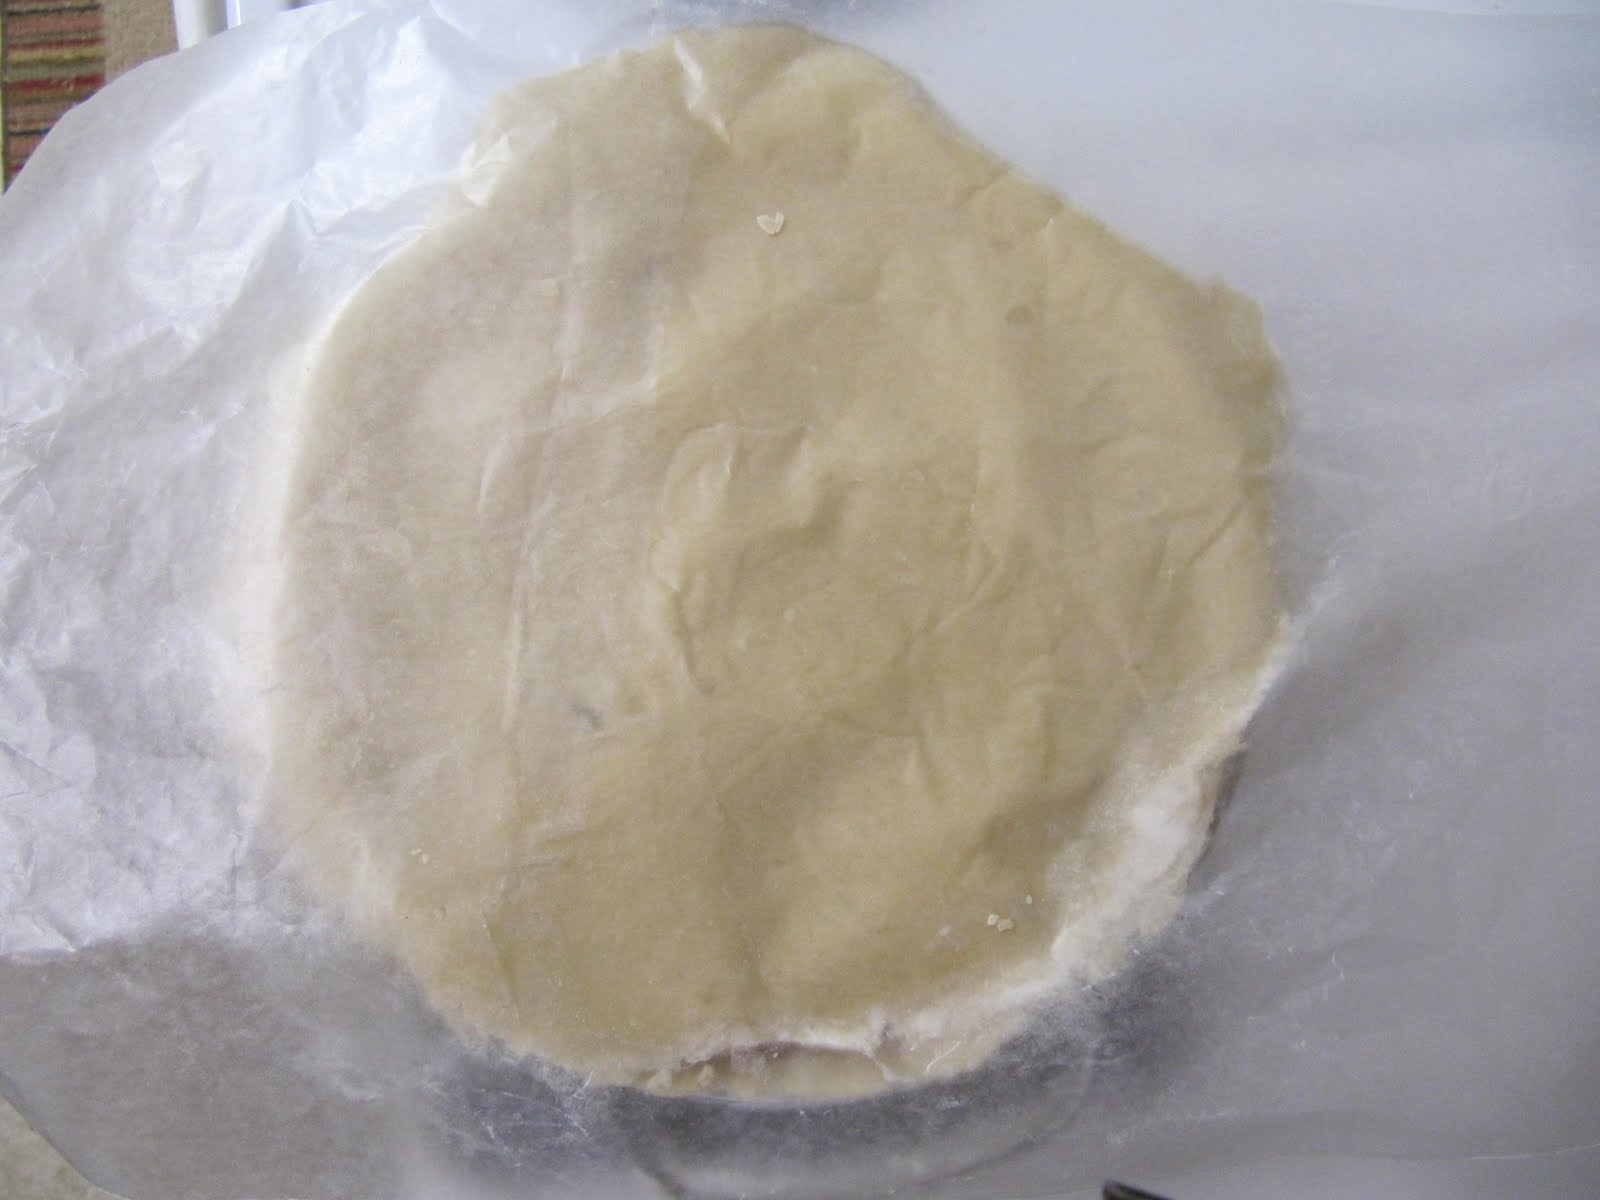
Take your second dough ball and roll it out. If you have a hard time picking up the dough and transferring it to the pie, then you can roll the dough out on a floured piece of wax paper.
Transfer the top crust to the pie.
Remove wax paper if you used any.
I can never seem to get the dough to just the right size so I have to do a little patch work.
If you desire you can coat the top of the pie with a small amount of milk. 2 tbsp. would be plenty. I use a pastry brush and just brush the milk over the top of the pie. This will help the pie brown. Don't forget to cut slits in the top of the crust to allow the steam to escape.
Take a sheet of aluminum foil and tear it in half, then fold each piece in half.
Wrap the aluminum foil around the edge of the pie crust. This helps prevent the edges from burning or browning faster than the rest of the crust.
Bake at 375 for 40 minutes with the foil. Remove the foil and bake for another 20 minutes. I like to place a cookie sheet under my pie while it bakes to catch anything that might run out of the pie.
Take the pie out and let it cool for a couple of minutes before serving. You can always reheat the pie and it will be just as good! Enjoy!!
Happy Baking!!
I promise baking isn't that bad. I know a lot of people are intimidated by baking and stay far, far away. The first thing to baking is making sure you have plenty of time to bake. If you feel rushed, then you are likely to mess something up, at least I am.
Here are the ingredients
For double pie crust:
2 1/4 cups all purpose flour
3/4 tsp salt
2/3 cup shortening
8-10 tbsp. water
For filling:
2 cans sliced peaches, drain 1 can
3/4 cup sugar
2 tbsp. all purpose flour
1/2 tsp. ground cinnamon
1/8 tsp. ground nutmeg
milk (optional)
Start by making your crust. Dump the flour, shortening, and salt into a bowl. You can use your hands, a pastry mixer, or (the quickest way) a mixer.
Mix the ingredients with a little water. Remember you can always add more water, but you can't take it out. When the dough is mixed it should be a little stiff, but stick together.
I like to take my dough and wipe the excess flour off the side and roll it into two balls with my hands.
Sprinkle some flour onto the surface you will roll your dough on. Then place one of the dough balls on the floured area and pat the dough into a circle with your hands. The flatter you get the dough, the less you have to do with a rolling pin. Sprinkle the dough with flour.
Roll out your dough to the size of your pie plate.
Carefully lift you dough and place into the pie plate. Press the dough down with your fingers so it fits well.
Combine the peaches, sugar, spices, and flour into a bowl.
Stir the mixture together with a spoon.
Pour the mixture into the pie shell.
Take your second dough ball and roll it out. If you have a hard time picking up the dough and transferring it to the pie, then you can roll the dough out on a floured piece of wax paper.
Transfer the top crust to the pie.
Remove wax paper if you used any.
I can never seem to get the dough to just the right size so I have to do a little patch work.
If you desire you can coat the top of the pie with a small amount of milk. 2 tbsp. would be plenty. I use a pastry brush and just brush the milk over the top of the pie. This will help the pie brown. Don't forget to cut slits in the top of the crust to allow the steam to escape.
Take a sheet of aluminum foil and tear it in half, then fold each piece in half.
Wrap the aluminum foil around the edge of the pie crust. This helps prevent the edges from burning or browning faster than the rest of the crust.
Bake at 375 for 40 minutes with the foil. Remove the foil and bake for another 20 minutes. I like to place a cookie sheet under my pie while it bakes to catch anything that might run out of the pie.
Take the pie out and let it cool for a couple of minutes before serving. You can always reheat the pie and it will be just as good! Enjoy!!
Happy Baking!!
Labels:
recipes
Subscribe to:
Posts (Atom)